


Looking to learn how to make your own lavender soap?
Making your own soap is very satisfying. Not only can you choose what kind of soap base you use, you can also choose from endless possibilities of scents, colors and textures.
The official process of making soap from scratch is rather involved (remember Fight Club?).
Luckily, there are a lot of resources that sell melt and pour soap bases, that you can simply heat to liquify, add your desired colors, scents, textures, and then pour into molds to solidify.
It’s a much easier and faster method than making soap from scratch, bu t you can still get very creative with your soap recipes.
Read on to find out how to make this lavender lemon honey lemon melt and pour soap!
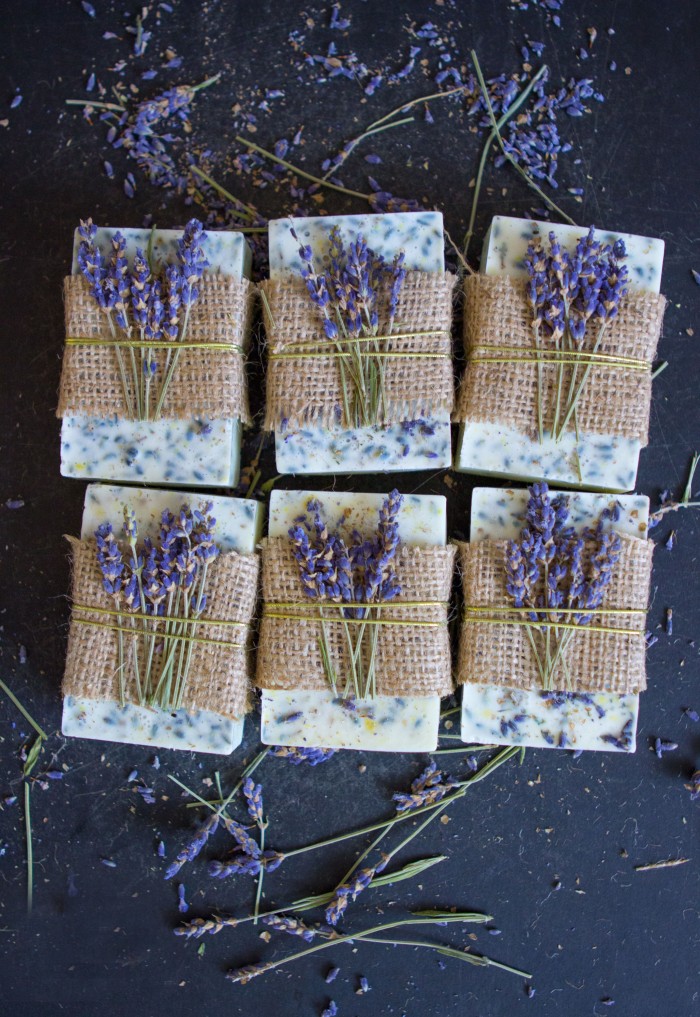
HOW TO MAKE LAVENDER LEMON HONEY SOAP

What you need
- 2 lb goat’s milk melt-and-pour soap base (I found mine on Amazon, this yields about 6-8 bars for me in a 3.8 oz bar mold)
- 1 lemon rind, zested
- 3 tablespoons of dried lavender buds
- 2 tablespoons of honey
- 15 drops of lavender essential oil
- 6 drops of lemon essential oil
- Jar or bowl for melting soap base (in microwave or double boiler)
- Grater (for zesting)
- Silicone mold

THE INSTRUCTIONS


4. While your soap chunks are in the microwave (or double boiler), measure out your lemon zest, lavender and honey in small bowls for easy adding once your soap is melted.


7. Have your mold ready on a flat and even surface. You’ll want to move quickly before the soap cools too much. Mix everything thoroughly again, and pour mixture into mold.

8. Once mixture is poured into mold, sprinkle extra lavender buds on top. Do so while it’s still warm so buds solidify with soap.
9. Let the soap cool until bars are completely solid.


MORE BATH & BODY DIYS TO TRY:
How to: Make Vanilla Rose Bath Salts
How to: DIY Lemon Exfoliating Salt Body Scrub
MORE POSTS YOU'LL LOVE

This post may contain affiliate links, which means I'll receive a small commission if you purchase through my link. Please read full disclosure here.